Did you know Martha Argerich performed her first piano concert at 8? Yes, she did! She played Beethoven's Concerto No.1. However, even though her debut age is well-known, only a few know when she began learning piano.
She started receiving professional piano training at the age of 3. At age 5, she was already a piano learner under Vincenzo Scaramuzza. Dear readers, if Argerich needed 5 years of training before her first concert, I think we would be no different.
We will also need similar time and patience to succeed in our musical journey. So, let's begin today; let's start by labeling the piano keys.
A Brief Introduction to Piano Keys
Before labeling the keys, it's best to know which key stands for what.
1. What are Piano Notes?
Understanding Piano Notes and Keys
Piano notes are the symbols that represent the pitch and duration of a sound in musical notation. Put simply, piano notes represent the sounds you hear, while the piano keys represent the notes you play.
When it comes to learning the piano, there are 12 unique notes. Out
2. What are forks and chopsticks on piano?
A piano/keyboard keys are a repetition of a set of 12 keys–7 white keys and 5 black keys. The group of two black keys are called chopsticks because they are two in number like a set of chopsticks.
Similarly, the group of three black keys are called forks because they’re three in number like the teeth of a fork.
3. What Notes Do the White Keys Represent on the Piano?
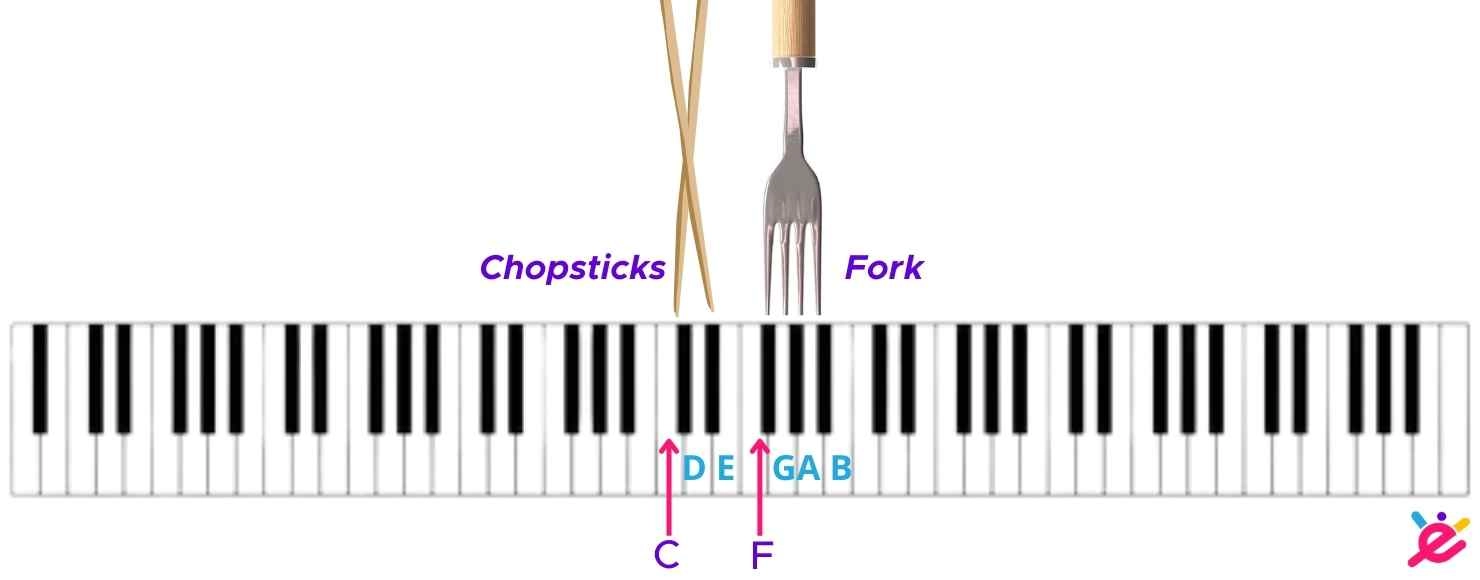
Fork and Chopsticks on this instrument Generally, the white keys are a lot in numbers. Besides that, pianos/keyboards come in different sets of keys. While the standard number is 88, some have 49, 54, or even 32.
Therefore, you must track down the middle C to figure the rest. First, figure out the middle of this instrument. Then, find the chopsticks (a group of two black keys) that fall nearest to the center.
(If you're struggling to find the middle of the piano, then, count the fourth chopsticks from the left. This tip is for folks with 88 key piano.)
The note to the left of the chopsticks (a set of two black keys) is C. The note to the left of the fork (a set of three black keys) is F. Once you find the middle C, follow the following alphabetical order:
C, D, E, F, G, A, B

Just keep in mind that it follows the same order as English alphabet but only till G. Then, the pattern repeats itself.)
4. What Notes Do the Black Keys Represent on the Piano?
Black keys on a piano are of two types–sharp or flat. While the black notes immediately to the right of the white notes are Sharp Keys, the black notes to the left are the Flat keys.
The sharp keys are denoted with a hashtag #, and the flat keys are denoted with lowercase b. For instance, the black key to the left of C is C sharp (C#).
Not to forget, the same key can also be called D flat (Db), as it is to the left of D. Again, the next black key (of the chopstick) is called D sharp (D#) or E flat (Eb). It's followed by F sharp (F#) or G flat (Gb), then G sharp (G#) or A flat (Ab), and lastly, A sharp (A#) or B flat (Bb).
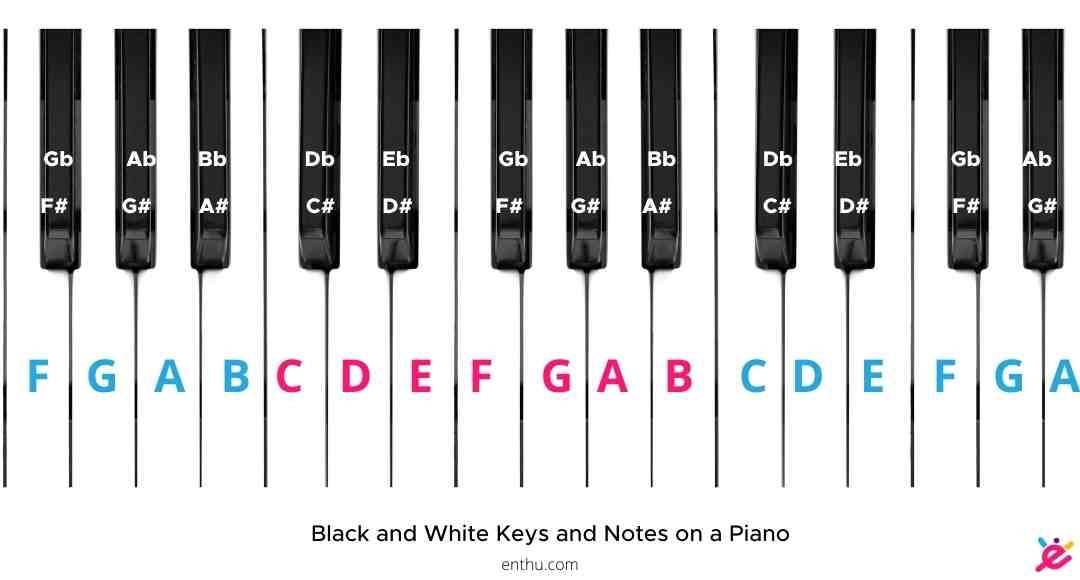
The middle
C in a 76-keys Piano is the third C from the left. Want to know the Middle C in 69-Keys Piano?
How to Label Piano Keys?
There are various ways of labeling the keys based on what and how you want to label them.
1. Use Colored Stickers
Again, there are several ways in which you can use colored stickers to label piano keys.
Use VIBGYOR stickers on white keys
Material Required: Colored stickers in seven (VIBGYOR) colors. Step by Step Process: Put violet stickers on C, indigo stickers on D, blue on E, green on F, and so on.
*****This process is for those who can remember that black sharp keys are to the right of the white notes and black flat keys are to the left of the white.
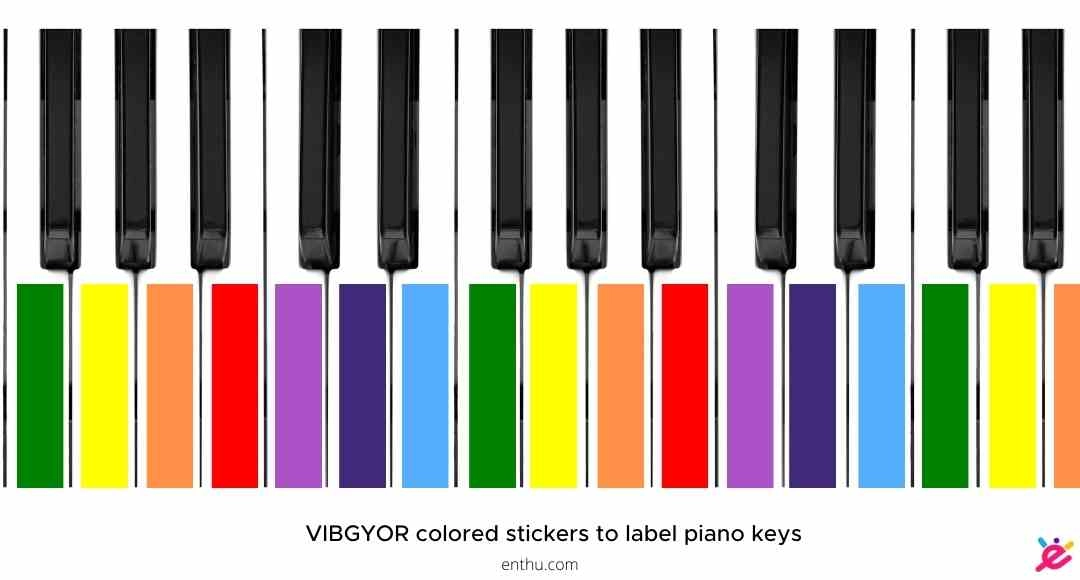
Write the notes on the VIBGYOR colored stickers
Material Required: Colored stickers in seven (VIBGYOR) colors and a black marker.
Step by Step Process: Put violet stickers on C, indigo stickers on D, blue on E, green on F, and so on. Then, use the black marker to write the notes on the stickers.
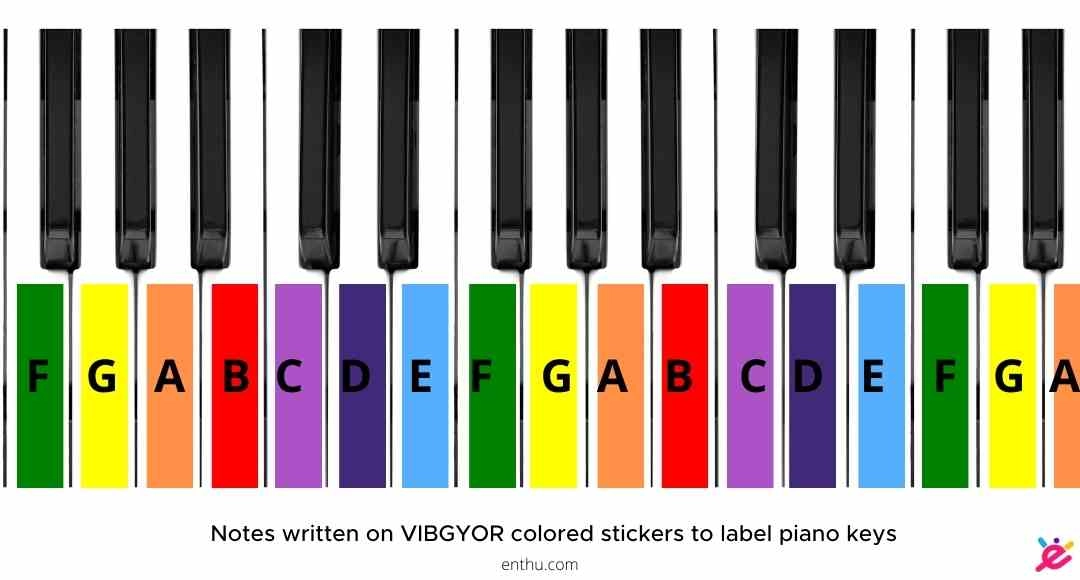
*****Again, this process is for those who can remember that black sharp keys are to the right of the white notes and black flat keys are to the left of the white.
Write the notes on the black keys and put VIBGYOR colored stickers on the white keys
Material Required: Colored stickers in seven (VIBGYOR) colors, white sticker, and a black marker. Step by Step Process: Begin by putting violet stickers on C, indigo stickers on D, blue on E, green on F, and so on.
Then, use the black marker to write the notes on the stickers. Next, paste the white stickers on the black keys. You can use white stickers of any shape available for you.
Now, use the black marker to write the black keys but don't forget to use # and b wherever applicable.
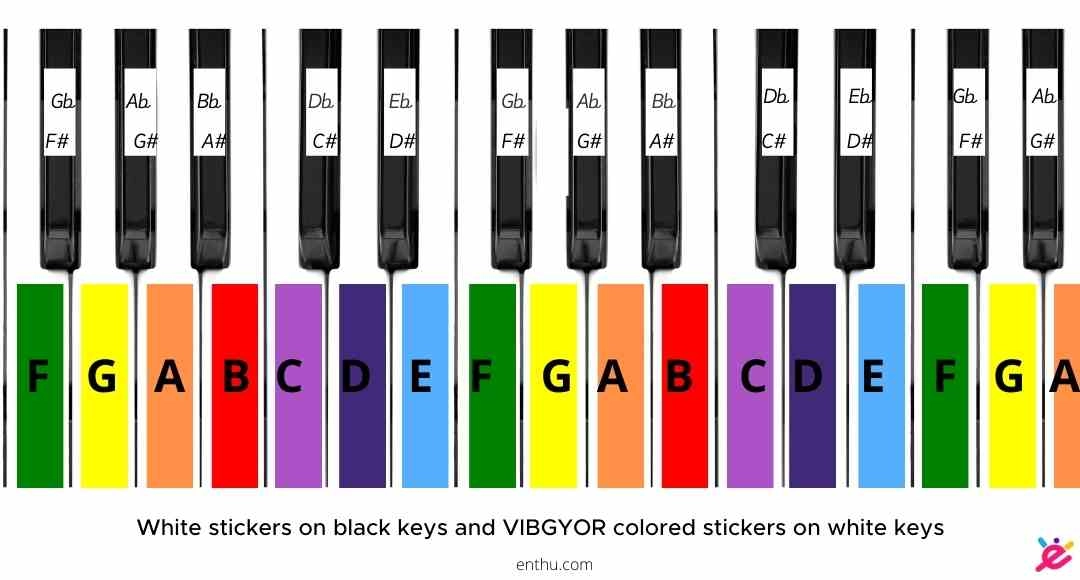
Use the same colored stickers for all keys. Material Required
Color stickers in a single color (your favorite color) and a black marker/sketch pen. Step by Step Process: Put the stickers on all the keys. Then, use the black marker to write the notes on the stickers.
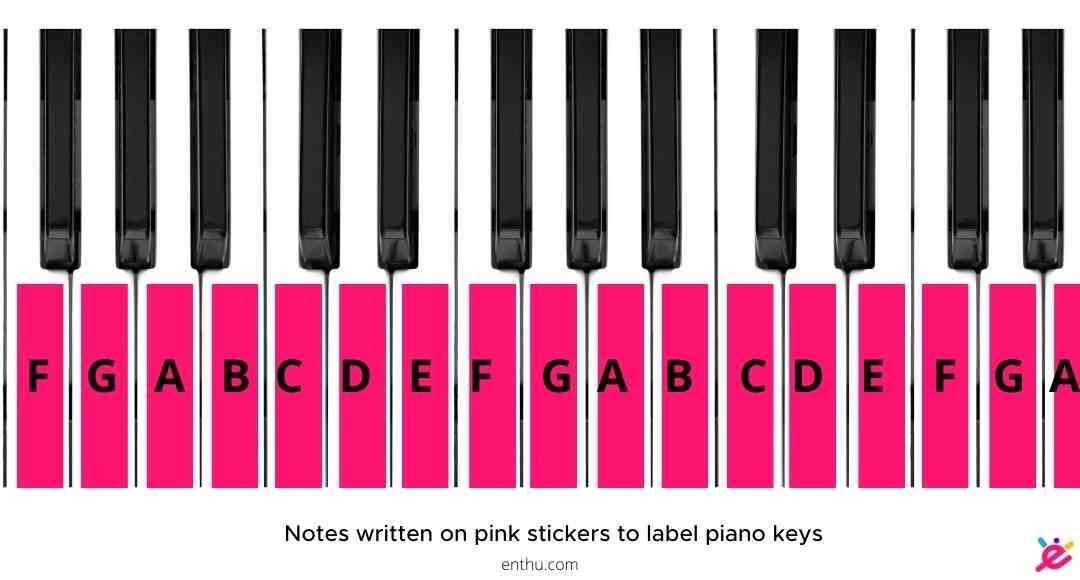
*****This process is for those who can remember that black sharp keys are to the right of the white notes and black flat keys are to the left of the white.
2. Use a Marker
Material Required: A black marker and a white marker. Step by Step Process: Use the black marker to write the notes on the white piano keys. Don't use a sketch pen.
For the black keys, use the white marker. Don't forget to use # and b wherever applicable.
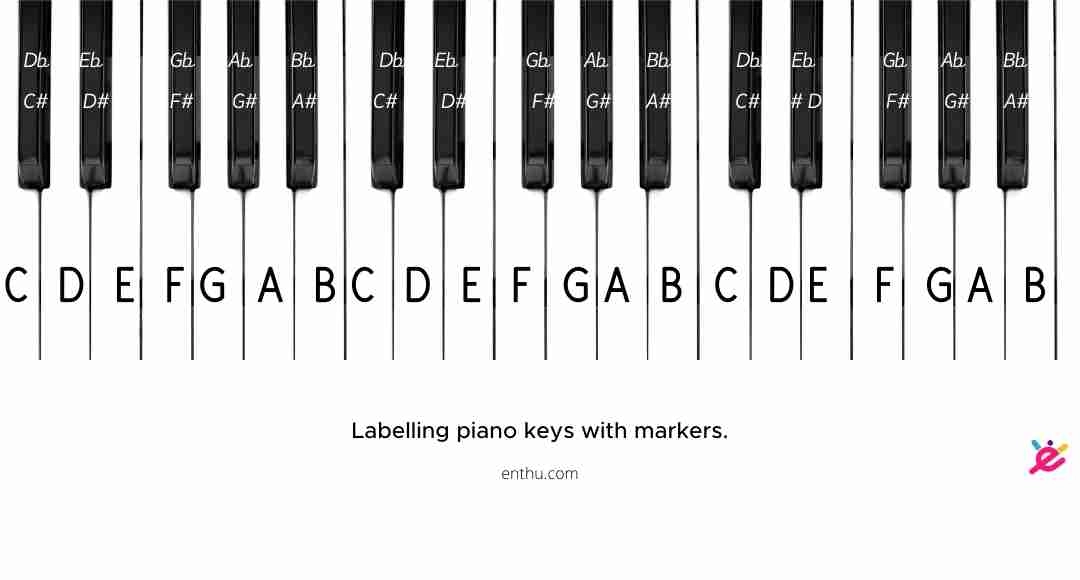
Did you know Beethoven didn't play a piano?

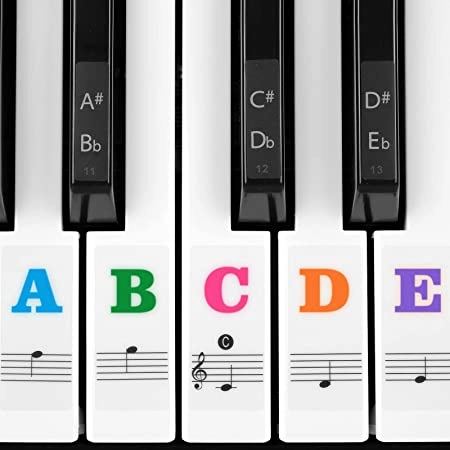
3. Use Readymade Piano Stickers
Many beginners prefer this process because it's hassle free and swift. All you need is to buy the notes and notation stickers and paste them on the keys. You will find piano stickers on amazon or nearest sheet music store.
4. Label the Keys that You Need
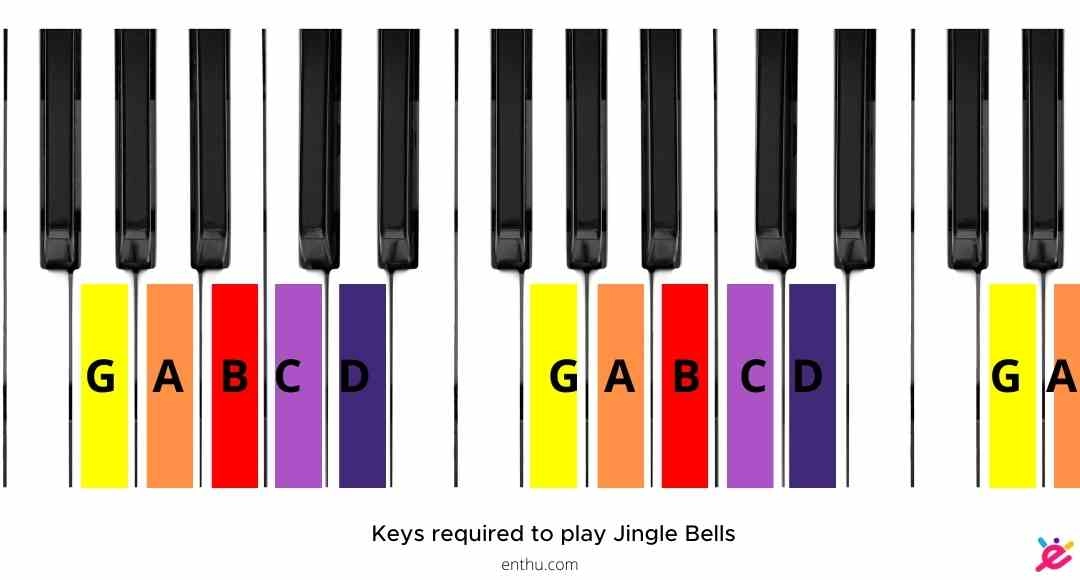
Sometimes, when you're learning a particular piece, you need only the keys that are in that particular music. So, in such cases, you can label only those keys.
For example, if you're trying to learn Jingle Bells, you will need C, D, G, A, and B. Therefore, mark only those keys either with colorful stickers or write on the keys with a marker.


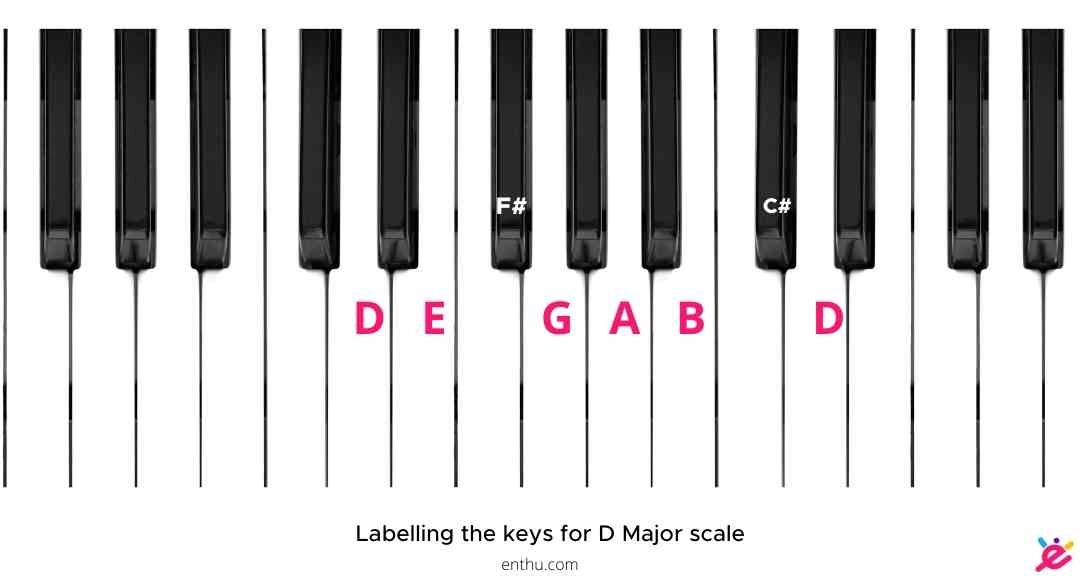
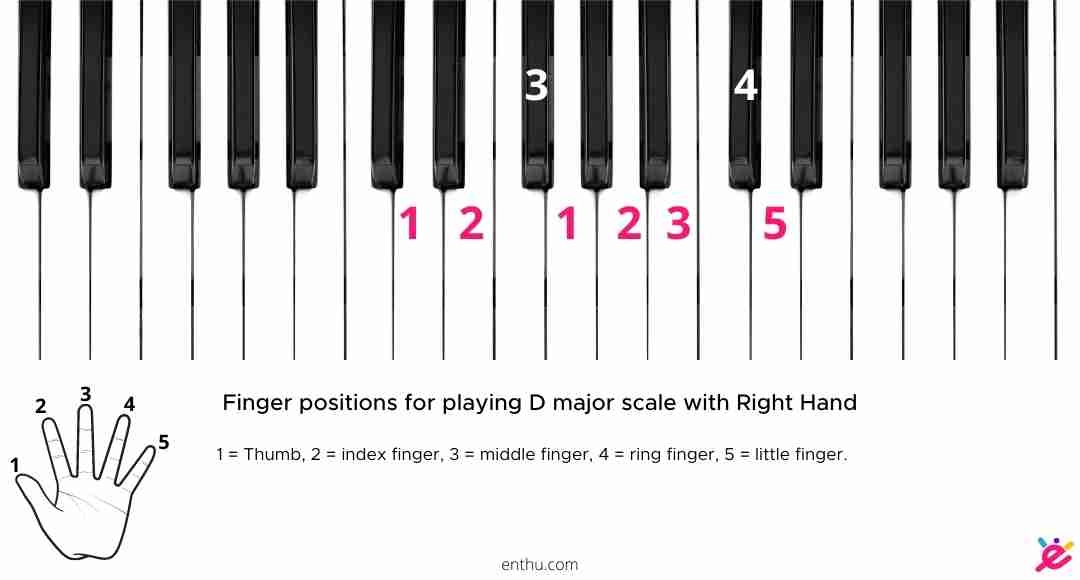
Furthermore, some students also label the keys to learn piano scales and chords. For instance, if you're finding it hard to remember how to play D major scale on piano, you can label the keys.

D major scale: D – E – F# – G – A – B – C# – D
Learn about Piano Major Chords and Minor Chords Checkout Piano Chords 101: A Simple Guide to explore

5. Label the Information that You Need
Notes, Notation, and Numbers While some beginners label the keys only with the notes, some like to label musical notation as well. There is also a keyboard course that teaches by labeling a particular piece's finger positions.
To label notation, buy notation stickers from sheet music stores or music shops and stick them according to your needs.
If you're struggling to read sheet music (or understand concepts like beat, time signature ), I highly recommend labelling the keys. Trust me; it will help.
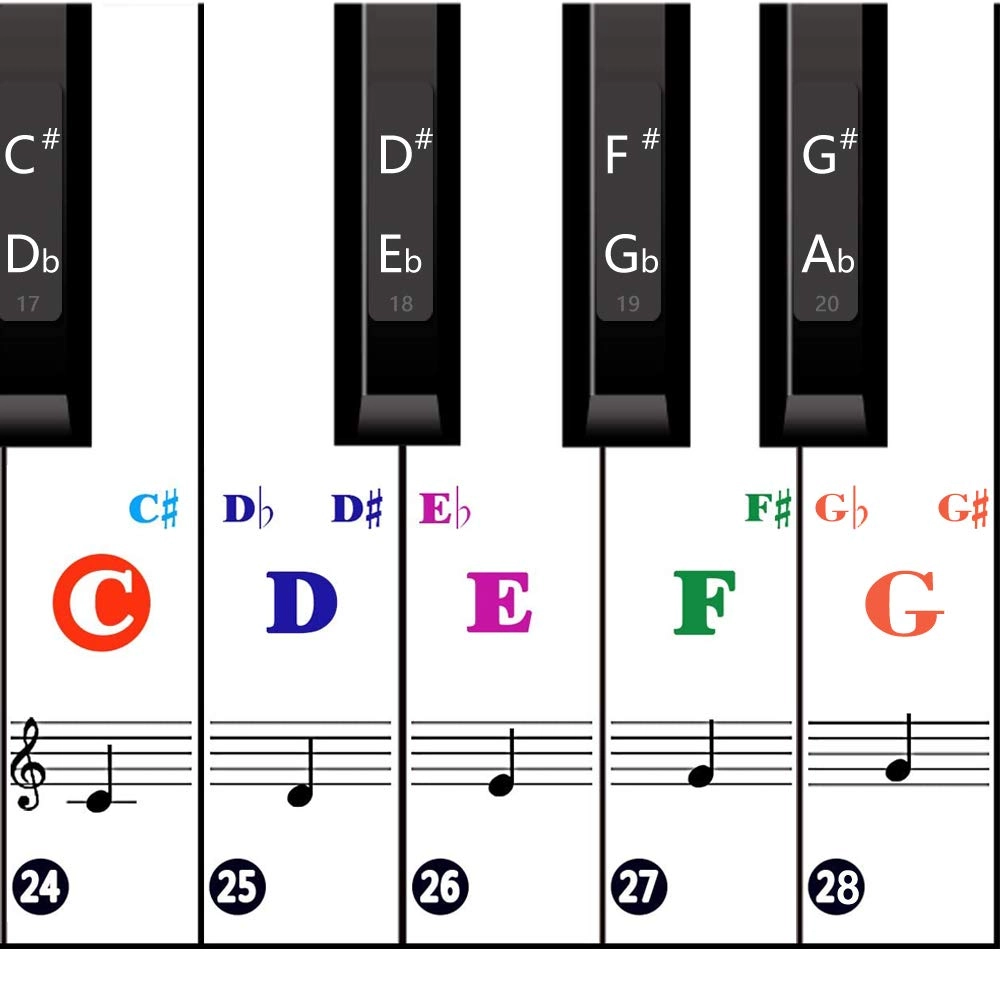
To label finger positions, paste 1, 2, and 3 stickers (available in bookstores and toy stores) as per the instructions you received from your trainer.
To learn how to label piano keys by watching somebody do it, watch this
Learn to Read Piano Sheet Music Checkout "How to Read Sheet Music" to find out what staff and clef mean

Different Types of Piano Labelled
1. 88-Keys Piano
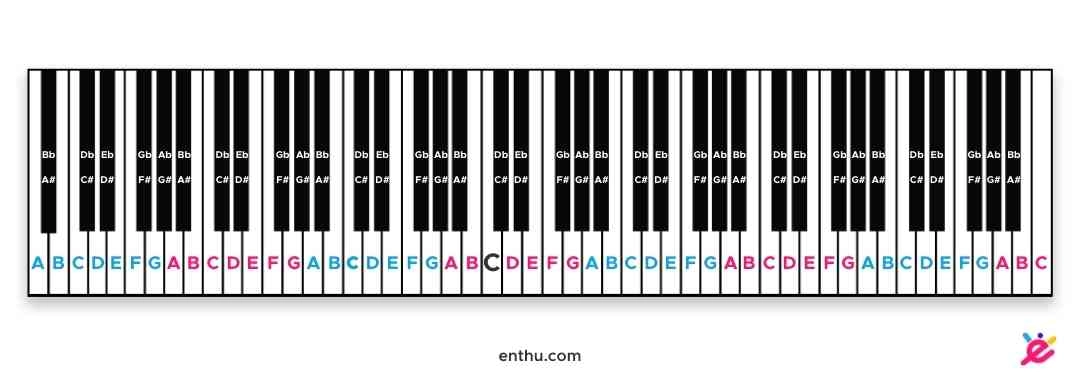
2. 76-Keys Piano
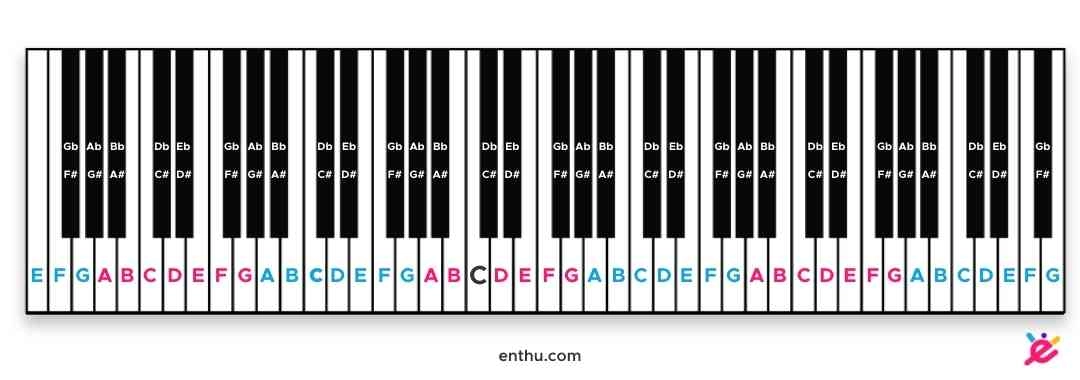
3. 61-Keys Piano
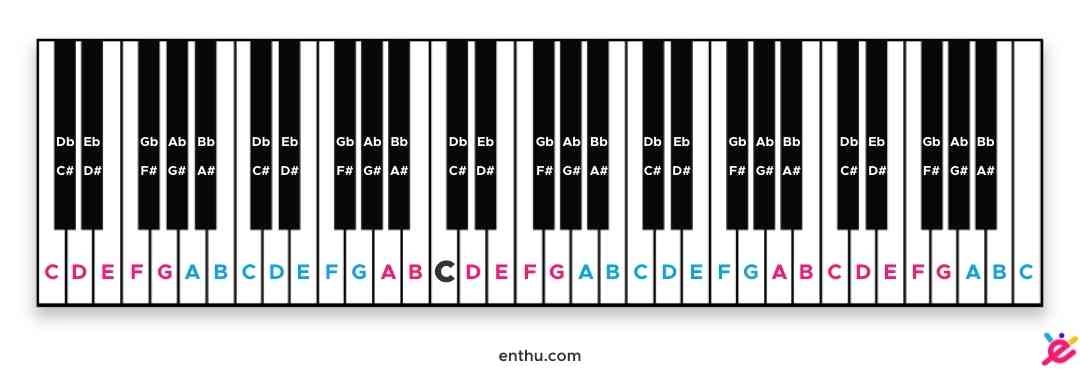
4. 49-Keys Piano
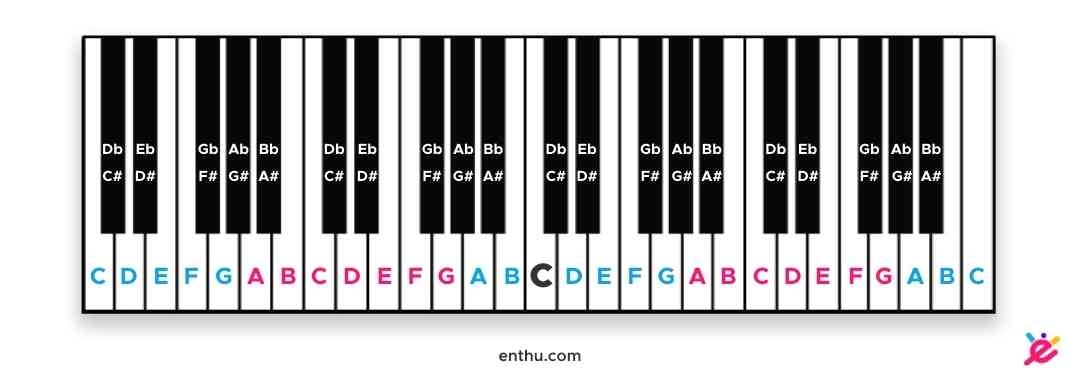
Why Should You Label Piano Keys?
When I began my piano lessons, the 88-keys were no more than a long zebra crossing for me. I couldn't imagine memorizing 88 keys. Could you? Then, my piano teacher suggested labeling the piano keys, and I will tell you why.
1. Labeling Piano Keys Help you
Memorize the Keys Faster Every beginner starts their journey with the same dream–to become a pianist someday.
But can you imagine becoming a pianist without knowing the keys? Without learning the keys, every lesson will become twice as difficult.
So, label the piano keys to memorize them and get started with advanced piano training asap.
Bechstein v/s Steinway | Which is better?

2. Labeling Piano Keys Help to Learn Piano Scales
There are a total 12 piano scales, and all of those are different sets of piano keys. Some say you can't even play piano by ear unless you're good with piano scales.
Imagine somebody practicing piano scales without knowing the keys. Can you? I bet you can't.
Nevertheless, why stop practicing piano scales even if you don't know the keys by heart? Instead, label the piano keys and continue with your practice without any hindrance.
3. Labeling Piano Keys Help to Learn Piano Chords
There are 9 types of piano chords, and each type has a definite set of three chords. It's impossible to learn the essential piano chords without knowing the keys.
But why wait to practice piano chords till you memorize the 88-keys? Therefore, I suggest labeling the 88 piano keys to practice piano chords and becoming a professional piano player.
4. Label the Piano Keys to Play Beginner's Songs
Any beginner pianist wishes to play a birthday song for their loved ones. Moreover, if piano learner is young, they love to play rhymes like Twinkle Twinkle Little Star or songs like Baby Shark.
But without the knowledge of the piano keys, all of these seem like a distant dream. So, go ahead; label your pianos today. Why wait till you memorize all the keys to play some melody for yourself!
Learn the difference between Console and Snippet pianos
Read "Different Types of Piano" to pick the right piano for yourself .


Conclusion
Labeling piano keys is indeed a marvelous idea to recognize the keys for beginners. Talking from my own experience, I think using stickers or markers is a great idea to memorize which key represents what.
However, please remember that these labels are always for temporary use. Our piano teacher made us remove the stickers one-by-one, as we kept learning the keys.
All I am trying to say is that stickers/labels aren't a permanent solution. This process is to help you memorize the keys and play without any help. So, eventually, you learn how to play piano by ear.
FAQs
1) Which labels work best for piano keys?
The color coding labels work best for piano keys. This way, the keys don't get messed up with the marker or glue but still have labels on them. Therefore, using colorful stickers to level piano keys is the best option.
2) Is it okay if I print them myself, or should I buy them from a company that sells these kinds of products and services?
It's always appreciable if someone finds the notes and prints them to make labels, as this process provides enough revision to the piano learner. However, if you're to avoid the hassle, then I suggest buying stickers from a sheet music shop.
3) Should I label the keys on my piano?
This is a difficult question to answer, as there are pros and cons to labeling the keys on your piano. On the one hand, labeling the keys can help you to remember which keys are which, which can be helpful if you are struggling to learn the instrument.
Additionally, labeling the keys can help you to stay organized and make it easier to practice. However, there are also some people who believe that labeling the keys doesn't help in learning piano by ear.
This is because you can become too dependent on the labels and don't learn to recognize the sound in the long run. Ultimately, it is on you to weigh the pros and cons before making any decisions.


![How to Label Piano Keys? [Pictures Included]](https://enthu.com/blog/media/x5okKB7AvnjCgot1.jpg)


Comments